Knowledge
Motorized Zoom Lens for AOI: Magnification Change Without Stopping the Line
Short answer: an AOI machine usually needs two views of the same part — a wide view to find the region of interest and a narrow view to confirm the defect. A motorized zoom lens gives you both from one camera position, and it can change magnification between products without a mechanical re-tooling step. What decides whether it works on your line is not the zoom ratio: it is how long the change takes, how repeatably the lens returns to the same magnification, and whether the part stays inside the field of view while the magnification moves. This page covers all three, with the actual published specifications of the POMEAS 6.5X and 12.5X motorized zoom families.
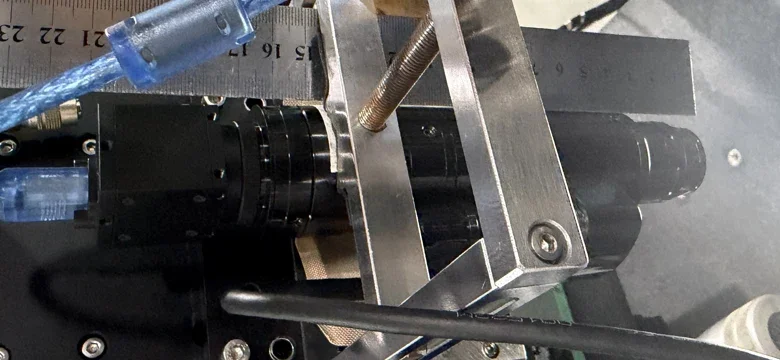
1. Why an AOI Line Wants Two Magnifications
Automated optical inspection rarely runs at a single magnification, because the two jobs on the same board have opposite optical requirements:
- Finding a component, a fiducial, a connector or a region of interest needs a wide field of view. At a wide field you can cover a whole device in one exposure and you can tolerate a few millimetres of positional error from the handler.
- Confirming a defect — a solder void, a hairline crack, a missing fillet, a foreign particle — needs object-side resolution in the single-digit micrometre range, which means a narrow field of view.
If you use two fixed-focal lenses you need two cameras or two stations, and you have to move the part between them. If you use one fixed-focal lens you have to choose which of the two jobs to do badly. A motorized zoom lens is the third option: one camera, one optical axis, two or more magnification settings that the AOI software selects from recipe data.
This is why AOI appears explicitly in the published application list of the POMEAS motorized continuous zoom family (semiconductor, electronics, AOI, automated machine vision). The lens is not sold as a microscope accessory; it is sold as an inspection-station component whose magnification is an addressable parameter.
2. What “Without Stopping the Line” Actually Requires
“Change magnification without stopping the line” is often read as a single number. In practice it is three separate requirements that fail independently:
| Requirement | What it means physically | How it typically fails |
|---|---|---|
| Change time fits the takt | The magnification change must complete inside the interval the AOI software has reserved for it, including the settle time and any re-exposure. | The mechanism moves fast but the software waits a fixed conservative delay, or the change is triggered mid-exposure and the frame is unusable. |
| Magnification is repeatable | Every time the recipe calls for “high magnification”, the optical magnification must come back to the same value, not merely close to it. | An open-loop drive with no position feedback drifts; measurement recipes silently drift with it. |
| The part stays in view | Zooming changes the field of view substantially, so a feature found at low magnification must still be inside the frame at high magnification. | The zoom axis and the optical axis are not sufficiently coaxial, so the field centre walks as you zoom. |
Only the first of the three is a “speed” question, and it is the one customers most often ask about. The second one is the one that damages yield data, and the third one is the one that produces intermittent “the lens lost the part” complaints.
3. What the Magnification-Change Time Is Made Of
POMEAS does not publish a single “changeover time” figure for a zoom lens, and any supplier that does is describing one specific controller, travel and load. The honest way to plan a line is to decompose the interval and measure your own configuration. The change interval contains at least these five parts:
| # | Component | Set by | Can you reduce it? |
|---|---|---|---|
| 1 | Command transmission and parsing | RS-232 baud rate, command queue depth, PLC scan time | Yes — higher baud rate, direct serial rather than a polled fieldbus gateway |
| 2 | Motor travel | Zoom stroke and the drive speed set by the controller | Yes — up to the point where overshoot and settle time dominate |
| 3 | Closed-loop settle time | Servo tuning, mechanical play in the zoom mechanism | Partly — this is where a rail-guided or closed-loop design earns its cost |
| 4 | Optical settle | Any residual movement of the optical group after the motor stops | Rarely — it is a mechanical property of the lens |
| 5 | Re-exposure and re-evaluation | Exposure time at the new magnification, plus the AOI algorithm | Partly — higher magnification often needs more light, which lengthens exposure |
Items 1 to 3 are the ones a lens supplier can influence. Items 4 and 5 usually belong to the machine builder and the AOI software vendor. This is why a “changeover time” figure quoted without the controller and camera settings is not usable for line planning.
How to measure it on your own station: timestamp the trigger that requests the new magnification, timestamp the frame that the AOI software accepts as valid at the new magnification, and take the difference over at least ten cycles. Record the worst case, not the average. Ten cycles is also the basis of the acceptance procedure used for magnification repeatability, which is covered below.
4. Manual, Detented or Motorized: Which One Belongs on an AOI Line
All three zoom types exist in the POMEAS range, and they are not interchangeable on an automated line.
| Type | How magnification is set | Typical role on an AOI line | Main limitation |
|---|---|---|---|
| Motorized | A motor drives the zoom group, usually under closed-loop control; the recipe or PLC issues a position command. | Recipe-driven magnification changes, multiple product types on one station, magnification recorded per image. | Needs a control interface and a place in the machine sequence; adds cost. |
| Detented (fixed positions) | The zoom ring clicks into defined positions, so each position is mechanically repeatable. | Lines with two or three fixed recipes where an operator or a simple actuator can select a position. | Only the detented positions are available; not continuously variable. |
| Manual | An operator turns the zoom ring. Some manual models still report magnification over RS-232. | Set-up, laboratory and low-volume stations; also the basis of a manual-to-motorized upgrade path. | Not suitable for unattended operation; repeatability depends on the operator. |
A useful intermediate case is a manual zoom lens with electronic magnification feedback. The zoom itself is manual, but the lens reports its magnification position over RS-232, so the AOI software can still label every image with the magnification it was taken at. That solves traceability without putting the zoom axis under automatic control. It does not solve unattended magnification changes.
5. Repeatability Matters More Than Zoom Ratio
Zoom ratio is the headline number — 6.5:1 or 12.5:1 — but it only says how wide the magnification range is. For an AOI line the number that decides whether recipes stay valid is magnification repeatability: the spread of measured magnification when the lens is commanded to the same setting repeatedly.
The reason is arithmetic. Every measurement recipe converts pixels to millimetres using the magnification at which the image was taken. If the magnification is 2% different from the value assumed by the recipe, a feature that measures 1 mm is reported as 0.98 mm or 1.02 mm — a 20 µm error, which is larger than most AOI defect tolerances.
This is where a closed-loop design matters. The POMEAS LZ-650104, for example, is specified as Motorized (closed-loop DC servo) with a 9-pin RS-232 control interface, single or dual axis. The closed loop is not there to make the lens faster; it is there to make the commanded magnification reproducible.
Acceptance procedure: command the lens to one magnification, capture, measure a known artefact, return to the wide setting, then come back to the same magnification. Repeat ten times. Report the maximum deviation of the measured dimension, not the mean. The same ten-cycle logic is used across the POMEAS zoom range and is documented separately for the motorized families.
6. Control and Integration: RS-232, SDK and the PLC Trigger
In an AOI machine the zoom lens is a motion axis. It is commissioned the same way as a camera or a light controller:
- RS-232 is the standard interface on the motorized families. The published specification for LZ-650104 is a 9-pin RS-232 interface supporting single or dual axis control, which means one serial port can drive zoom and focus on a dual-axis unit.
- A software SDK is the usual route when the AOI application runs on a PC. The SDK exposes magnification as a settable parameter, so the AOI recipe can store a magnification value next to the exposure and light values.
- A PLC trigger is the usual route when the machine sequence lives in a PLC. The camera is triggered by the machine; the lens should be commanded in the same sequence, before the exposure, not in parallel with it.
The integration detail that causes the most field problems is triggering. If the zoom command and the camera trigger are issued at the same moment, the camera may expose while the optical group is still settling. The reliable pattern is: command the zoom, wait for the lens to report that it has reached position (or for a conservative fixed delay measured on your own station), then trigger the camera.
7. Sensor Size: What the 6.5X and 12.5X Families Actually Cover
This is a specification point that is frequently mis-stated, so it is worth being exact.
- The POMEAS 6.5X motorized families (LZ-650104, LZ-650105, LZ-650100DS9, LZG-63104-A) are published with a maximum sensor size of 2/3 inch and a C-mount interface.
- The POMEAS 12.5X motorized continuous zoom family (for example PMS-LZL-12104-D1) is also published with a maximum sensor size of 2/3 inch and a C-mount interface.
- Larger sensor formats are covered by separate POMEAS series — for example the 4K zoom lens line for 1-inch sensors, and the telecentric measurement lenses for their respective formats. A 1.1-inch camera should be matched against the series that is specified for it, not against a 2/3-inch zoom lens.
If you fit a 2/3-inch lens to a larger sensor, the image circle does not cover the corners and the field of view you actually get is the lens’s, not the sensor’s. The correct matching rule is that the lens image circle must be at least the sensor diagonal, with margin — never exactly equal.
8. Magnification, Field of View and Object-Side Resolution
Three quantities are often confused in AOI specifications. They are related but none of them substitutes for another:
- Optical magnification is the ratio between the image on the sensor and the object. It is what the zoom ring or the motor changes. For LZ-650104 this is 0.7X to 4.5X; for the 12.5X family it is 0.58X to 7.5X.
- Field of view is what you actually see on the part. It is the sensor format divided by the magnification, so it shrinks as magnification rises. The published FOV tables give it directly, which is safer than deriving it from a nominal sensor figure.
- Object-side resolution is the smallest detail the lens can resolve at the object. It is a property of the optics and the aperture, not of the camera. For LZ-650104 it is published as 11.18 µm at 0.7X falling to 3.95 µm from 3.0X to 4.5X.
Note the pattern in that last figure: resolution improves with magnification up to a point and then stops improving, because the aperture stops being the limit. Detecting a defect of a given size therefore has a practical magnification ceiling, and pushing past it adds field-of-view loss without adding detection capability. That trade-off is treated in more depth on the resolution-versus-magnification page.
9. Lighting Has to Change With the Magnification
A magnification change is also a lighting change, and this is the most commonly under-planned part of an AOI zoom station.
- The field of view can change by more than ten times between the widest and narrowest setting. A ring light sized for the wide view becomes a small bright spot at the high-magnification setting, and the outer part of the frame goes dark.
- The working distance of these lenses is fixed by the model — 82 ± 2 mm for LZ-650104, 87 ± 2 mm for LZG-63104-A, 77.4 ± 2 mm for the 12.5X family — so the lighting geometry has to fit that distance once, for both magnification settings.
- Higher magnification usually means a larger f-number and therefore dimmer imagery, so exposure has to rise. That feeds back into the change time discussed in section 3.
The practical rule is that the illumination must be specified for the narrowest setting you intend to use, and then checked for evenness at the widest. Which illumination type suits a given surface — backlight, coaxial, dome or low angle — is a separate decision, and it should be made before the zoom lens is fixed.
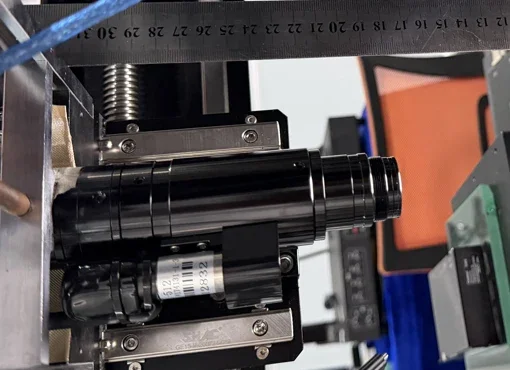
10. Published Specifications: 6.5X Motorized Continuous Zoom (LZ-650104)
| Parameter | Specification |
|---|---|
| Model | LZ-650104 |
| Category | Motorized Zoom Lens |
| Zoom ratio | 6.5:1 |
| Optical magnification | 0.7X – 4.5X |
| Working distance | 82 ± 2 mm |
| Maximum sensor size | 2/3 inch |
| Mount | C-Mount |
| Zoom mode | Motorized (closed-loop DC servo) |
| Control interface | 9-pin RS-232, single / dual axis |
| Optical resolution | 11.18 µm (0.7X) – 3.95 µm (3.0X–4.5X) |
| Depth of field | 1.9 mm (0.7X) – 0.1 mm (4.5X) |
| Numerical aperture | 0.03 – 0.085 |
| F/No. | 11.6 – 26.5 |
| TV distortion | 0.019% – 0.035% |
Field of view for a 2/3-inch sensor, as published for this model:
| Magnification | FOV (D × H × V, mm) |
|---|---|
| 0.7X | 15.71 × 12.57 × 9.43 |
| 1.0X | 11.00 × 8.80 × 6.60 |
| 1.5X | 7.33 × 5.87 × 4.40 |
| 2.0X | 5.50 × 4.40 × 3.30 |
| 2.5X | 4.40 × 3.52 × 2.64 |
| 3.0X | 3.67 × 2.93 × 2.20 |
| 3.5X | 3.14 × 2.51 × 1.89 |
| 4.0X | 2.75 × 2.20 × 1.65 |
| 4.5X | 2.44 × 1.96 × 1.47 |
11. Published Specifications: 6.5X Motorized Rail Zoom (LZG-63104-A)
The rail-guided variant is the one to look at when zoom-axis straightness matters, because the optical group travels on a mechanical rail rather than on the barrel alone.
| Parameter | Specification |
|---|---|
| Model | LZG-63104-A |
| Product type | Motorized Zoom Rail Lens |
| Zoom ratio | 6.5X |
| Optical magnification | 0.7X – 4.5X |
| Working distance | 87 ± 2 mm |
| Maximum sensor size | 2/3 inch |
| Camera mount | C-Mount |
| Zoom control | Motorized |
| Mechanical structure | Rail-guided |
| Depth of field | 1.90 – 0.10 mm |
| Numerical aperture | 0.030 – 0.085 |
| F-number | F11.6 – F26.5 |
| Optical resolution | 11.18 – 3.95 µm |
| TV distortion | 0.001% – 0.035% |
| Overall length | 136.60 mm |
| Maximum outer diameter | Ø46.60 mm |
Optical parameters by magnification step, as published:
| Magnification | Depth of field | NA | F-number | Resolution | TV distortion |
|---|---|---|---|---|---|
| 0.7X | 1.90 mm | 0.030 | 11.6 | 11.18 µm | 0.019% |
| 1.0X | 0.952 mm | 0.042 | 12.1 | 7.99 µm | 0.035% |
| 1.5X | 0.440 mm | 0.060 | 12.5 | 5.59 µm | 0.002% |
| 2.0X | 0.290 mm | 0.070 | 14.2 | 4.79 µm | 0.003% |
| 2.5X | 0.230 mm | 0.070 | 17.8 | 4.79 µm | 0.004% |
| 3.0X | 0.160 mm | 0.085 | 17.6 | 3.95 µm | 0.001% |
| 3.5X | 0.130 mm | 0.085 | 20.5 | 3.95 µm | 0.001% |
| 4.0X | 0.120 mm | 0.085 | 23.5 | 3.95 µm | 0.002% |
| 4.5X | 0.100 mm | 0.085 | 26.5 | 3.95 µm | 0.002% |
Field of view by sensor format, as published for this model:
| Magnification | 2/3-inch FOV | 1/2-inch FOV | 1/3-inch FOV |
|---|---|---|---|
| 0.7X | 15.71 × 12.57 × 9.43 mm | 11.43 × 9.14 × 6.86 mm | 8.57 × 6.86 × 5.14 mm |
| 1.0X | 11.00 × 8.80 × 6.60 mm | 8.00 × 6.40 × 4.80 mm | 6.00 × 4.80 × 3.60 mm |
| 1.5X | 7.33 × 5.87 × 4.40 mm | 5.33 × 4.27 × 3.20 mm | 4.00 × 3.20 × 2.40 mm |
| 2.0X | 5.50 × 4.40 × 3.30 mm | 4.00 × 3.20 × 2.40 mm | 3.00 × 2.40 × 1.80 mm |
| 2.5X | 4.40 × 3.52 × 2.64 mm | 3.20 × 2.56 × 1.92 mm | 2.40 × 1.92 × 1.44 mm |
| 3.0X | 3.67 × 2.93 × 2.20 mm | 2.67 × 2.13 × 1.60 mm | 2.00 × 1.60 × 1.20 mm |
| 3.5X | 3.14 × 2.51 × 1.89 mm | 2.29 × 1.83 × 1.37 mm | 1.71 × 1.37 × 1.03 mm |
| 4.0X | 2.75 × 2.20 × 1.65 mm | 2.00 × 1.60 × 1.20 mm | 1.50 × 1.20 × 0.90 mm |
| 4.5X | 2.44 × 1.96 × 1.47 mm | 1.78 × 1.42 × 1.07 mm | 1.33 × 1.07 × 0.80 mm |
12. Published Specifications: 12.5X Motorized Zoom (PMS-LZL-12104-D1)
When the AOI requirement spans a very wide range — a whole-device view plus sub-millimetre detail — the 12.5X family is the one that covers it in a single optical assembly.
| Parameter | Specification |
|---|---|
| Model | PMS-LZL-12104-D1 |
| Product type | Motorized Continuous Zoom Lens |
| Zoom ratio | 12.5X / 12.5:1 |
| Optical magnification | 0.58X – 7.5X |
| Working distance | 77.4 ± 2 mm |
| Maximum sensor size | 2/3 inch |
| Camera mount | C-Mount |
| Zoom control | Motorized |
| TV distortion | 0.001% – 0.050% |
| Reference FOV range | Approx. 1.47 – 18.97 mm diagonal |
| Typical applications | Semiconductor, electronics, AOI, automated machine vision |
Two things are worth reading out of this table. First, the published reference field-of-view range spans roughly 1.47 mm to 18.97 mm on the diagonal, which is the whole-device-to-detail range an AOI station needs. Second, the working distance stays at 77.4 ± 2 mm across the entire magnification range, so the fixture and the lighting do not have to move when the magnification changes. That single property is what makes a zoom lens viable on an existing station.
13. Worked Example: Replacing Two Fixed Lenses With One
A conveyor-fed AOI station inspects a populated board. The engineering requirement is stated as two views:
- a find view that must cover about 18 mm of the part on the diagonal, to locate the connector and place the region of interest;
- a verify view that must resolve the smallest defect of interest, which is specified as a few micrometres.
Step 1 — check the field-of-view range. The published reference FOV range of the 12.5X motorized zoom is approximately 1.47 mm to 18.97 mm diagonal. The required 18 mm find view falls inside the range.
Step 2 — check the resolution at the magnification that gives the find view. Reading the 6.5X family table as the worked case: at 0.7X the field is 15.71 × 12.57 mm on a 2/3-inch sensor and the published optical resolution is 11.18 µm; at 3.0X and above the field has narrowed to 3.67 × 2.93 mm and resolution has reached its floor of 3.95 µm.
Step 3 — identify the magnification that meets the defect specification. Because resolution stops improving between 3.0X and 4.5X while the field keeps narrowing, the correct answer is the lowest magnification at which the resolution target is met, not the highest magnification available. Choosing 4.5X instead of 3.0X costs about 34% of the field width and buys no additional optical resolution.
Step 4 — confirm the part stays in view. The find view is 15.71 mm wide and the verify view at 3.0X is 3.67 mm wide, so the part must be positioned to better than roughly half the verify field — about 1.8 mm — for the feature to remain inside the frame after the magnification change. If the handler cannot hold that, the fix is not a more expensive lens: it is a vision-guided move of the axis between the two views.
Step 5 — check the lighting at both ends. The illumination must give even coverage over the 3.67 mm verify field and still illuminate the 15.71 mm find field without hot spots. As noted in section 9, the light is specified for the narrower view and checked at the wider one.
Note on figures: the magnification, field-of-view, working-distance and resolution values used above are the published specifications of the named models. The step-3 comparison and the step-4 positioning tolerance are arithmetic consequences of those published values, not measured results from a specific customer line.
14. When a Motorized Zoom Lens Is the Wrong Answer for AOI
A motorized zoom lens is a cost-effective answer to a specific problem: one camera position that must serve more than one magnification. It is not a universal upgrade.
| Situation | Better choice | Why |
|---|---|---|
| The station inspects one product at one magnification | Fixed-focal or a single-magnification lens | You would be paying for a motion axis you never command. |
| The measurement tolerance is a few micrometres and must be traceable | A telecentric measurement lens | Telecentric lenses remove the magnification-with-distance error that a zoom lens cannot. |
| The defect is a dimensional tolerance on a thin feature seen against a background | A telecentric lens with the appropriate illumination | The measurement depends on where the edge is defined, not on how much you magnify. |
| The part height varies more than the depth of field at the verify magnification | Autofocus, a larger depth of field, or a height-measuring stage | At 3.0X the published depth of field of the 6.5X rail family is 0.160 mm; height variation will defocus the image. |
| You need a very wide field and a very high magnification at the same time, on the same part, at the same instant | Two stations | A zoom lens is sequential by nature; it cannot be wide and narrow at once. |
15. What to Send POMEAS to Size a Zoom Lens for Your AOI Station
| Item | Why it decides the answer |
|---|---|
| Camera model and sensor size | Determines the maximum magnification range available and the FOV at each setting. |
| Required find-view field (mm) | Sets the lower magnification limit. |
| Smallest defect or feature to be verified (µm) | Sets the upper magnification limit through the optical resolution figure. |
| Part height variation (mm) | Checked against depth of field at the verify magnification. |
| Available installation distance (mm) | Checked against the model working distance, e.g. 77.4 ± 2 mm or 87 ± 2 mm. |
| Number of magnification settings per recipe | Determines whether a detented or a continuously variable motorized lens is appropriate. |
| Control environment: PC, PLC or both | Determines whether RS-232, an SDK or a discrete trigger is used. |
| Takt time and the interval available for the magnification change | Determines whether a sequential two-view sequence fits the cycle at all. |
| Surface finish and illumination already available | Determines whether the current light can serve both magnification settings. |
16. Selection Steps
- State the two (or more) views as field of view and smallest defect, not as “how many times”.
- Convert both into a required magnification range using the published FOV table for your sensor format.
- Check the optical resolution at the verify magnification and pick the lowest magnification that meets it.
- Check the depth of field at that magnification against the part height variation.
- Confirm the working distance fits the mechanical space, and that lighting can be positioned at that distance.
- Decide the control route: manual with feedback, detented, or fully motorized.
- Verify magnification repeatability on the actual station, using at least ten cycles, before accepting the recipe.
- Measure the actual magnification-change interval with the real controller and camera settings, and make sure it fits the takt.
Frequently Asked Questions
Can a motorized zoom lens change magnification while the line is running?
Yes, if the machine sequence reserves an interval for it. The magnification change is a controlled motion of the zoom group; the AOI software commands a new magnification, waits for the lens to reach it, and then triggers the camera. The line keeps moving during that interval, but the part being inspected must remain in the field of view of the new magnification, which is why the field-of-view check in the selection steps matters.
How long does a magnification change take on an AOI line?
There is no single figure that applies to every configuration, and a supplier who quotes one is describing one specific controller, travel and camera setting. The interval is the sum of five parts: command transmission and parsing, motor travel, closed-loop settle time, residual optical settle, and re-exposure. Measure it on your own station by timestamping the zoom command and the first accepted frame after it, over at least ten cycles, and take the worst case.
Does the image stay in focus after a magnification change?
Parfocality — staying in focus across the magnification range — is a property of the optical design and of the lens adjustment. A parfocal zoom does not need a focus correction between settings; a lens that is not parfocal does. For a station that changes magnification unattended, parfocality is a requirement to verify rather than an assumption, and it is normally checked on the actual camera at the actual working distance.
Do I need to re-calibrate after every magnification change?
The optical magnification at each setting is fixed by the lens, so it does not need to be re-measured every cycle. What must be established once is a magnification value per setting, used by the measurement recipe to convert pixels to millimetres. That value is then protected by the lens repeatability, which is why the repeatability acceptance test in section 5 matters more than the nominal zoom ratio.
Can one zoom lens replace two fixed-focal lenses on an AOI machine?
It can, when the two fixed lenses differ mainly in field of view and the required optical resolution is available at the lower magnification. It cannot, when one of the two jobs is a dimensional measurement with a micrometre tolerance, because that class of measurement normally requires a telecentric lens rather than a higher magnification.
What magnification repeatability should I ask for?
Ask for it as a permitted deviation in the measured magnification between repeated visits to the same setting, and require it to be demonstrated on your station rather than quoted as a general figure. The practical test is ten cycles: go to the setting, measure a known artefact, leave the setting, return, and repeat. The number that matters is the maximum deviation, not the average.
Does the field of view change linearly with magnification?
Over the working range of a well-corrected zoom lens the field of view scales approximately with the reciprocal of the magnification, which is why the published tables show the field shrinking as magnification rises. For planning purposes use the published field-of-view table for your exact sensor format rather than calculating from a nominal sensor size, because the table already accounts for the real image circle and the real magnification.
Which sensor size can a 6.5X motorized zoom lens cover?
The published maximum sensor size for the POMEAS 6.5X motorized zoom families, including the LZ-650104 and the rail-guided LZG-63104-A, is 2/3 inch with a C-mount interface. The 12.5X motorized continuous zoom family such as PMS-LZL-12104-D1 is also published at a maximum sensor size of 2/3 inch. Larger formats are served by separate series, for example the 4K zoom line for 1-inch sensors; a 1.1-inch camera should be matched against the series specified for it.
Will the lighting still work after zooming to a different magnification?
Only if the illumination was specified for the narrowest setting. At the wide setting the light must cover a much larger area evenly; at the narrow setting the same light must not over-expose the reduced field. Because the working distance of these lenses is fixed by the model, the light geometry has to sit at that distance and still work at both ends of the magnification range.
How do I trigger a magnification change from the AOI software?
Either over RS-232 from the inspection application, through the lens SDK, or from a discrete PLC output. The pattern that avoids the usual field problem is to command the zoom first, wait for position confirmation or a measured delay, and trigger the camera afterwards. Issuing the zoom command and the camera trigger together can expose the sensor while the optical group is still settling.
Is a motorized zoom lens slower than a fixed lens?
Per image, yes: a fixed lens needs no motion. Per part, often no, because a fixed-lens solution that needs two stations or a re-fixturing step pays that cost on every part, while a zoom station pays only the magnification-change interval. The comparison should be made per cycle, not per frame.
What information should I send POMEAS to size a zoom lens for AOI?
Send the camera model and sensor size, the required find-view field in millimetres, the smallest defect size in micrometres, the part height variation, the available installation distance, the number of magnification settings per recipe, whether the control environment is a PC or a PLC, and the takt time with the interval available for the magnification change. Section 15 lists the same items with the reason each one matters.
Related Reading
- What Is a Motorized Zoom Lens? — how the motorized zoom family is built and controlled.
- Motorized Zoom Lens Applications — where a zoom lens replaces multiple fixed lenses across industries.
- Motorized Zoom Lens Repeatability and Magnification Consistency — the ten-cycle acceptance method in full.
- Motorized Zoom Lens Pulse Position and Magnification Table — mapping controller pulses to magnification.
- Motorized Zoom Lens RS-232 Serial Command Protocol — the command set used by the AOI application.
- POMEAS Motorized Lens SDK Integration Guide — integrating magnification as a recipe parameter.
- RS-232 Magnification Feedback for Automated Inspection — recording the magnification with each image.
- Multi-SKU Changeover With One Camera — the changeover question in FAQ form.
- Manual vs Motorized Zoom Lens — choosing the actuation type.
- Detented vs Continuous Zoom Lenses — the intermediate option between manual and fully motorized.
- Electric Zoom Lens for Electronics and Semiconductor Inspection — defect classes by component type.
- Selecting a Zoom Lens for a 10.4 mm FOV and 5 µm Defect — a full selection walk-through.
- Magnification Is Not Resolution — why higher magnification is not automatically better.
- Zoom Lens Magnification and FOV Calculator — converting a required field into a magnification.
- Camera Sensor and Zoom Lens Image Circle Matching — the sensor coverage rule in detail.
- Motion Blur, Exposure Time and Conveyor Speed — why the re-exposure part of the change interval matters on a moving line.
- How to Choose Illumination for Telecentric Measurement — what the illumination type actually decides.
- Motorized Zoom Lens Troubleshooting Guide — when the lens does not return to the expected magnification.
- 6.5X Zoom Lens Selection Guide — the 6.5X family in selection form.
- Zoom Lens vs Fixed Focal Lens — the trade at station level.
Related POMEAS Products
- LZ-650104 — 6.5X Motorized Continuous Zoom Lens (0.7X–4.5X, WD 82 ± 2 mm, 2/3 inch)
- LZ-650105 — 6.5X Motorized Coaxial Zoom Lens
- LZ-650100DS9 — 6.5X RS-232 Magnification Feedback Zoom Lens
- LZG-63104-A — 6.5X Motorized Zoom Rail Lens (WD 87 ± 2 mm, rail-guided)
- PMS-LZL-12104-D1 — Motorized 12.5X Zoom Lens for Automated Inspection (0.58X–7.5X)
- PMS-LZL-12101D — 12.5X Coaxial Industrial Zoom Lens
Talk to a Lens Engineer About Your AOI Station
The fastest way to get a usable answer is to send the two views as numbers: the field of view you must cover to find the part, and the smallest defect you must verify. With those two figures, the sensor format and the available installation distance, the magnification range and the model can be narrowed down without guessing.
Email: [email protected] | WhatsApp: +86 185 9810 2007
Please include: camera model and sensor size, required find-view field in mm, smallest defect in µm, part height variation, available installation distance, control environment (PC / PLC), and takt time with the interval available for the magnification change.
Reviewed by Tiger Xie.

Subscribe to Our Newsletter
Simply enter your email to receive the latest news and insights from Pomeas. Stay connected with Pomeas and be the first to discover new innovations in optical excellence.


