Knowledge
Microscope 400X vs Machine Vision Magnification: How Do You Convert It?
"I currently use a 400X microscope. What magnification zoom lens do I need?" — it is the most common opening line in microscope-replacement inquiries, and it cannot be answered directly, because the 400X and the lens magnification are not the same kind of number. This article walks the actual conversion: where 400X comes from, what the camera system measures instead, and the five steps from "400X" to a verified lens selection.
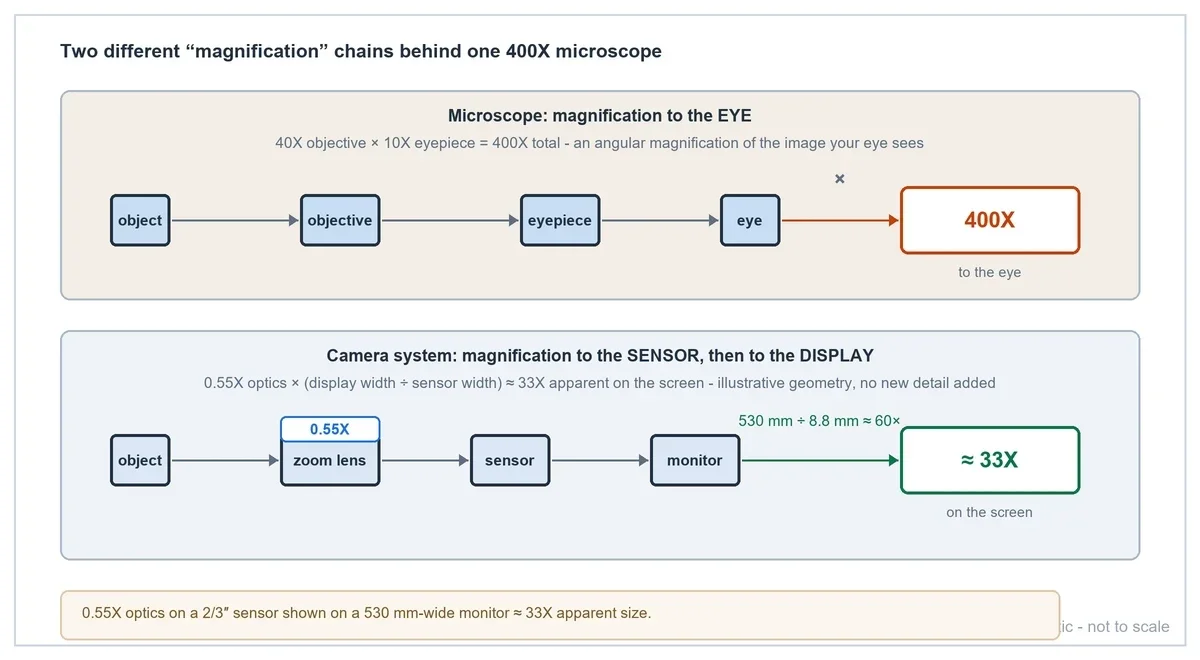
Where does 400X come from?
Microscope magnification is the product of two stages built for the human eye:
Objective magnification × Eyepiece magnification = Total magnification
40X objective × 10X eyepiece = 400X. Two things about this number matter for the conversion:
- It is magnification to the eye — an angular comparison against viewing the object unaided. It says nothing about the field of view unless the eyepiece field number is also known.
- The eyepiece contributes 10X of it while contributing no additional resolving power — resolution is set by the objective, mainly by its numerical aperture.
A camera-based system removes the eyepiece entirely. The lens images the object onto the sensor, and the display re-magnifies the sensor image for the eye. So the "missing 400X" is not missing — it has been split into a sensor-side number (object-side magnification) and a display-side number (electronic display magnification).
The three magnifications, in formulas
The companion guide From Microscope to Machine Vision explains these in depth; for the conversion arithmetic, three formulas are enough:
- Optical (object-side) magnification: β ≈ sensor size ÷ FOV
- Electronic magnification: the software zoom factor — enlarges pixels, adds no detail
- Display magnification: ≈ β × (display width ÷ sensor width) × software zoom
Only the first one appears in lens datasheets, and only the first one produces new optical information. The other two are presentation.
Step 1 — Convert "400X" into a required FOV
The 400X number by itself cannot be converted. What converts is what the operator could actually see and judge at 400X. In practice this means establishing:
- The widest field the inspection needs (find the part, see the whole feature)
- The finest field the inspection needs (judge the smallest detail)
- The smallest feature or defect that must be resolved at the finest field
A workable starting assumption for many bench inspections replacing a mid-range microscope objective is a horizontal FOV around 16 mm at the wide end — but it must come from the part, not from habit. If the current FOV is unknown, measure it: view a ruler or a calibration target under the existing microscope and record what width is visible. That single measurement is worth more than the magnification label.
Assume the requirement converts to: camera sensor 2/3″, maximum horizontal FOV 16 mm.
Step 2 — Compute the object-side magnification from the sensor
With the sensor and FOV fixed, the lens magnification is no longer a matter of opinion:
β = sensor width ÷ FOV = 8.8 mm ÷ 16 mm ≈ 0.55X
(8.8 mm is the 2/3″ format width used in POMEAS FOV tables; divide by your specific camera's active pixel-array width for an exact result.)
So the direct answer to the opening question is: a lens working at about 0.55X on a 2/3″ camera — not 400X. The same 16 mm requirement on a 1/2″ sensor would need 0.4X, and on a 1″ sensor about 0.72X. The camera choice and the lens magnification are two ends of one equation.
Step 3 — Verify the resolution chain
Magnification placed, the next question decides whether the conversion actually works: can the system resolve the smallest feature? Three checks, in order:
Sampling: pixels per feature
Object-side sampling = FOV ÷ horizontal pixel count. For the 16 mm example on a typical 5 MP, 2448-pixel-wide 2/3-class camera: 16 mm ÷ 2448 ≈ 6.54 µm/pixel. A feature spanning, say, 4 pixels is ≈ 26 µm wide. If the smallest defect is 10 µm, it lands on fewer than 2 pixels — the FOV or the camera must change before any lens discussion matters.
And the standing caveat: 6.5 µm/pixel does not mean 6.5 µm defect detection. Detection needs multiple pixels across the feature, sufficient contrast and stable imaging; the sampling figure is an input to the check, not a guarantee.
Lens resolution
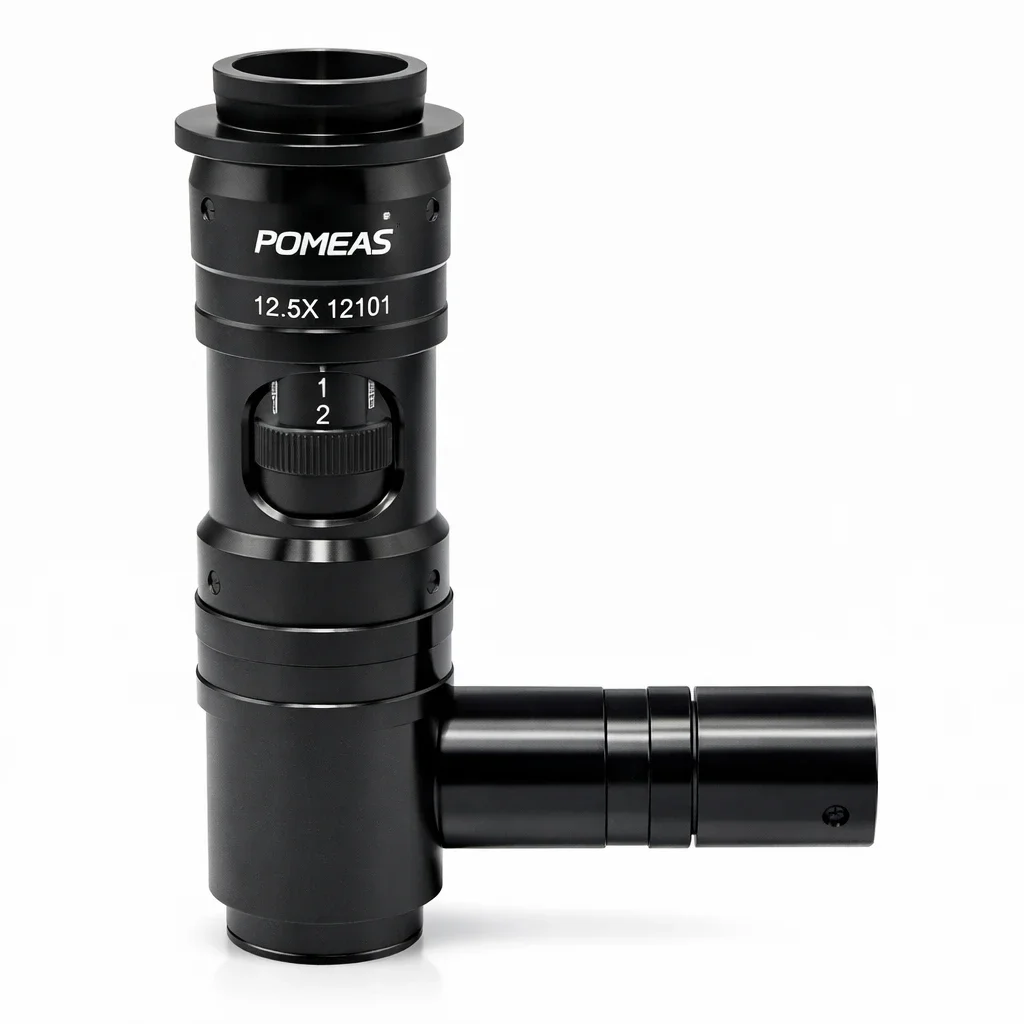
The lens must resolve at least as finely as the sensor samples. Real zoom lens figures for reference: the PMS-LZL-12101 states 13 µm resolution at 0.58X improving to 3.05 µm from 4.5X; the LZ-650104 states 11.18 µm at 0.7X and 3.95 µm from 3.0X. A 6.54 µm sampling therefore demands working at moderate-to-high zoom positions, not at the wide end — one more reason the FOV endpoints must be taken from the datasheet, not assumed.
Numerical aperture and contrast
NA sets the resolvable detail and the depth of field. Zoom bodies reach NA 0.025–0.110 across their range (LZL-12101 figures); if the smallest feature needs more, the answer is an APO microscope objective in front of the zoom or tube lens — for example the POMEAS 20X Plan APO L with NA 0.34 and 0.8 µm resolution — rather than more electronic zoom.
Step 4 — Match the zoom range to the FOV ratio
Zoom lens labels are ratios, not maxima: the "6.5X" LZ-650104 spans 0.7X–4.5X, and the 12.5X models span 0.58X–7.5X. Compare the FOV ratio of the requirement against the zoom ratio of the lens:
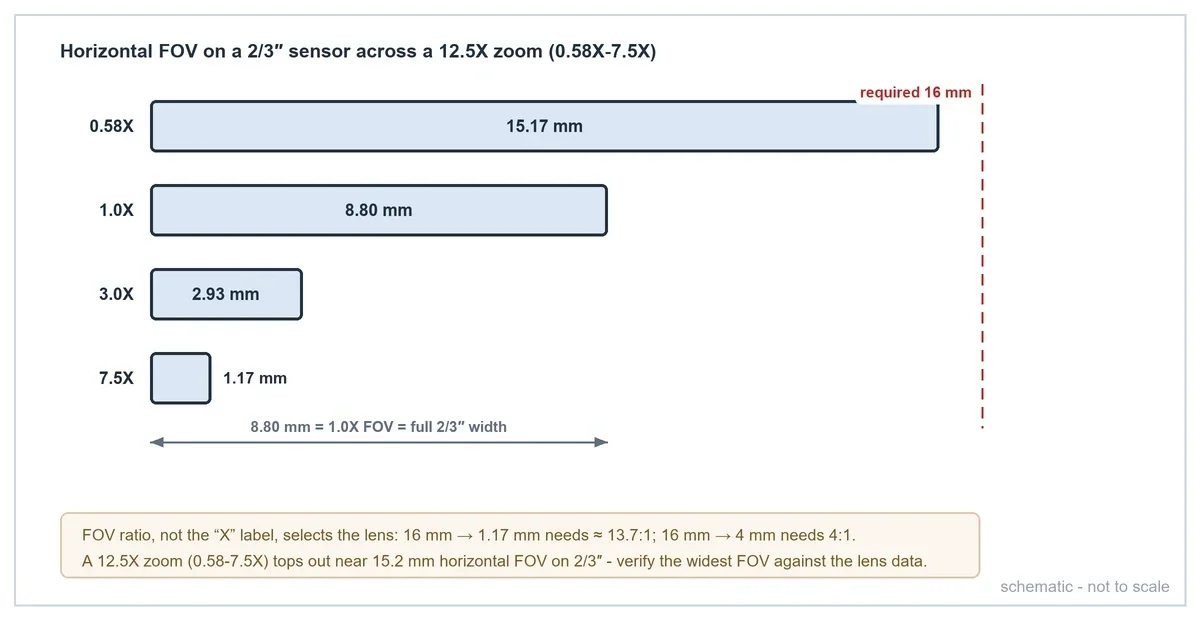
- 16 mm → 4 mm needs 4:1 → inside the 6.5X class
- 16 mm → 2 mm needs 8:1 → 12.5X class
- 16 mm → 1.3 mm needs ≈ 12.3:1 → top of the 12.5X class
Then verify both endpoints against the datasheet: widest FOV (magnification minimum × sensor width) and finest FOV, plus WD (77.4 ± 2 mm on the 12.5X models, 82 ± 2 mm on the LZ-650104) and sensor format coverage (2/3″ on both). The FOV calculation reference collects the formulas; the selection guide applies them model by model.
Step 5 — Decide manual, motorized or autofocus
- Manual zoom — one operator, one product family, occasional adjustment. The PMS-LZL-12101 is the manual 12.5X benchmark with coaxial illumination.
- Motorized zoom — PLC/PC control, recipe switching, multi-SKU automation. The PMS-LZL-12104-D1 (0.58X–7.5X, RS-232-class control) and the LZ-650104 (0.7X–4.5X, closed-loop DC servo) are the two reference ranges.
- Autofocus — required when part height varies between captures; real-time autofocus needs explicit evaluation of loop rate and focusing travel. Recipes with stored focus presets cover fixed-height SKU changes.
Workflow summary
- Write down the widest FOV, finest FOV and smallest feature (measure the old microscope's FOV if unknown).
- Fix the camera: sensor size, resolution, pixel size, mount.
- Compute object-side magnification = sensor width ÷ max FOV.
- Check sampling (FOV ÷ pixel count) and lens resolution against the smallest feature.
- Match the FOV ratio to a zoom class and verify both FOV ends, WD and sensor format on the datasheet.
- Choose manual / motorized / autofocus from the automation requirement.
Frequently asked questions
What lens magnification replaces a 400X microscope?
There is no direct equivalent. 400X described the image for the eye; the camera system needs a FOV. If the requirement is a 16 mm field on a 2/3″ sensor, the answer is ≈ 0.55X object-side — a number that comes from the FOV and sensor, not from the microscope label.
What is object-side magnification?
The magnification between the object and the image formed on the sensor: β = image size ÷ object size, or in machine vision practice, sensor size ÷ FOV. It is the only magnification a lens datasheet guarantees.
How does sensor size affect lens magnification?
For the same FOV, magnification scales with sensor width: 16 mm needs 0.55X on 2/3″ (8.8 mm), 0.4X on 1/2″ (6.4 mm), and ≈ 0.72X on 1″ (12.8 mm format width). The lens must also cover the sensor format.
Can digital zoom replace optical magnification?
No. Digital zoom enlarges pixels the sensor already captured; it adds no new detail. If a feature spans too few pixels, only changing the optics — magnification, sensor resolution, or NA — recovers it.
What magnification is needed for a 16 mm FOV?
On a 2/3″ sensor: 8.8 ÷ 16 ≈ 0.55X. The sensor size must be stated alongside the FOV, because the same 16 mm field needs different magnification on different sensors.
How do I select between 6.5X and 12.5X zoom lenses?
Compute the FOV ratio (widest ÷ finest). 16 mm → 4 mm is 4:1, comfortably inside the 6.5X class (0.7X–4.5X); 16 mm → 2 mm is 8:1, which needs the 12.5X class (0.58X–7.5X). Then verify the widest FOV against the lens's minimum magnification — on 2/3″ a 16 mm field needs 0.55X, slightly below the 12.5X models' 0.58X wide end, so confirm the final FOV and WD with the manufacturer.
Have a 400X conversion of your own?
Send us the numbers and we will run the conversion with you:
- Current microscope magnification
- Camera model or sensor size
- Maximum FOV and minimum FOV
- Smallest feature or defect
- Working distance
- Manual or automated inspection requirement
POMEAS can evaluate the required optical magnification, zoom range and imaging configuration — including the resolution checks that decide whether a zoom lens alone is enough.
Related reading

Subscribe to Our Newsletter
Simply enter your email to receive the latest news and insights from Pomeas. Stay connected with Pomeas and be the first to discover new innovations in optical excellence.


